
Batson upcurl
- Zenn Canters

- 20 mei 2020
- 4 minuten om te lezen
This guitar came in with a pesky problem; the strings were buzzing out on the high frets on the fretboard extension.
There can be lots of reasons for this: a high fret, an incorrect neck angle, a bridge saddle that's too low, ... But that wasn't the case on this one.
The fretboard extension (or tongue) on these is floating and completely free from the rest of the guitar. On this particular one, it started to curl upwards. A problem that can't be fixed with a trussrod adjustment or a similar simple fix.
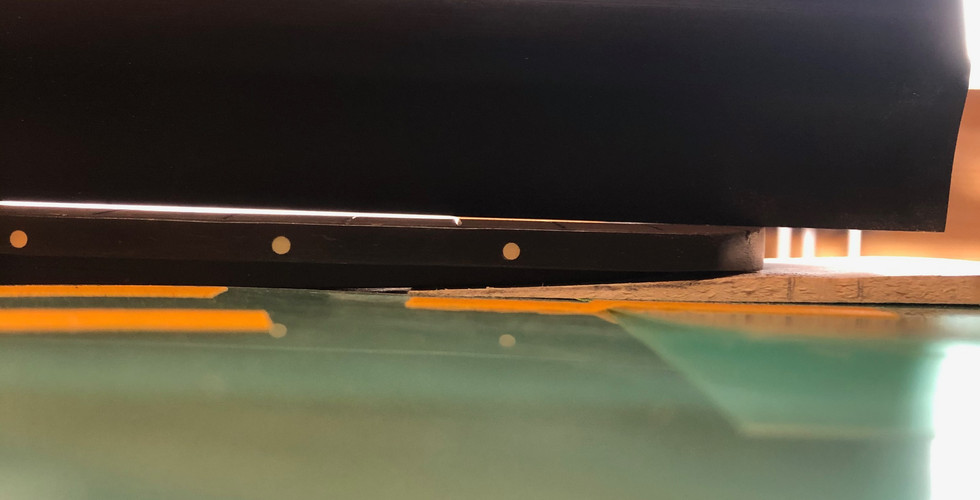
You can see the problem when I put a straightedge on this.
It's even more visible with the frets out, confirming the theory:
The base of the neck is straight without any major issues, but the tongue is curling up, causing light to show thru underneath the straightedge. So much so, that with the frets still in, it appears that it's a neck angle problem (the straightedge should touch the top of the bridge, not the top of the saddle). But luckily this wasn't the case.
<click the pic for more>


I decided the way to deal with this was to sand the fretboard level, and slightly oversand the tongue to create fallaway. This will not only improve the overall action and playability, but will limit the risk of this happening again.
But how can you sand a pretty thin, loose piece of wood in a controlled way?
There's just no way to do that unless it's supported.
So on we go with the shim making!
I started with a stack of very thin veneer, sliding them under the tongue piece by piece until it stops, then sliding the next one on top of that.
I taped those together and took them out from underneath the tongue.
Then I very carefully traced the outline onto a piece of maple. That gave a basic shape to work to.
You can see the result after some initial sanding and scraping. Still to big to fit all the way down, but it's doing what I want the end-result to do: raise up the tongue up at an angle so I can sand it down.
The next picture shows you the final shape, perfectly matched to those curves.
By the way, all that maple dust from sanding the shim doesn't go to waste.
I keep it in a jar along with my collection of different shavings and dust. You never know when you'll patch something with it!
<click the pic for more>


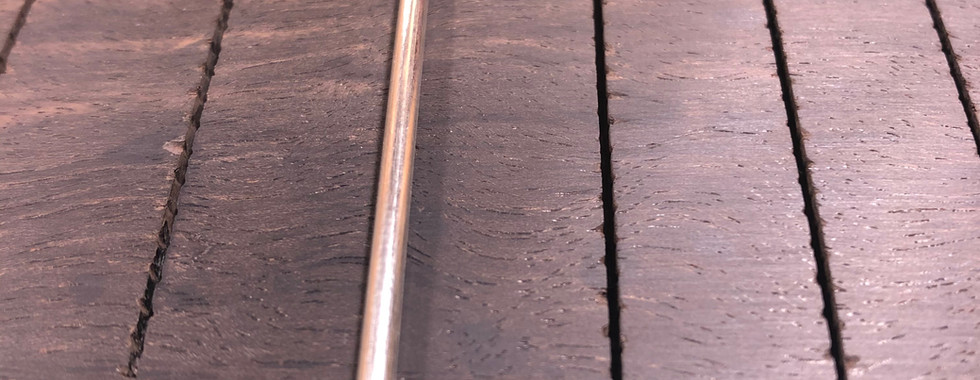
After sanding, the neck was completely flat with the correct radius, and we created some fallaway on the extension. You can see the light poking through.
The board was flat enough to keep the straightedge upright on its own.
The obligatory photo had to be taken :-).
This was just what I wanted!


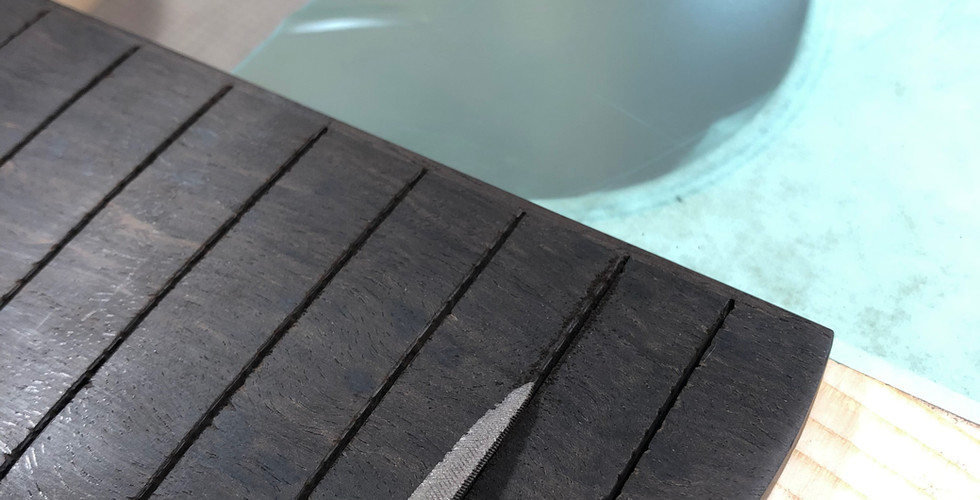
There were a couple of chips in the fretboard from pulling the old frets that I couldn't sand out when doing the neck. So I had to tackle these on their own.
In the pics I put and old fret over the slot as a visual reference.
Hold on to your hats, this is going to go fast:
Shot of the problem - teflon in the slot to keep any glue out, some dust from my collection that's slightly lighter in color than the fretboard because the glue will darken this - filled but still ugly as hell - scraped level to the board - sanded smooth - fret over it, GONE.


Next step: prepping the new frets.
First, I measure the old fretwire (always take measurements from a few different frets, a lot of times you'll see some variation.

The fretwire I chose has a width of .038", a perfect fit for the overall fretboard, but I don't want to put such a 'thick' fret into the tongue. I don't want to create any extra bowing in it if I can help it, even though a tighter fret should cause it to bend down even further than I sanded.
No need to take any risks, I was sure the sanding would be enough.
I'll have to hammer these frets in (since there's no option of pressing or clamping because we don't have a usable soundhole), but I don't want to hammer hard on this fragile piece of wood, as it might break.
The shim I made earlier now serves its second purpose: it gives me support from underneath, spreading the blow of the hammer out onto the top of the guitar, which I supported from the inside. Still, hammering on this weak piece wasn't something I was keen on doing.
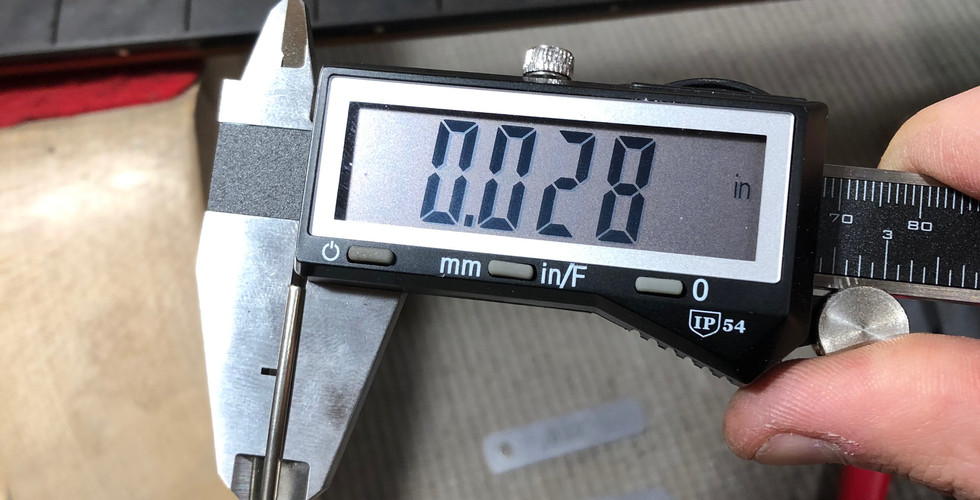
So I measured the fretslot size, they came out at .026".
To create a nice fit that would hold, but wouldn't be to hard to hammer in, I took the fretwire through the StewMac fret barber and took of some width. I ended up with a perfectly uniform .028" tang. To make the fretting of the tongue even easier, the fretslots are opened up with a small triangular file. This was one of the first tools I ever bought, it's pretty worn and beaten up.
No idea what I planned on using it for when I bought it, but it sure has its purpose now!
<click the pic for more>


All frets can go in now, I'm feeling good about this.
Seeing as the guitar has some faux binding, I undercut and filed the tang on all frets.
After they all went in I freehand the filing of the edges to the correct angle (don't try this at home kids).
They were pretty level all over, but I always check to make sure.
After that, on to the crowning with a traditional 3 corner file. I'm testing some diamond and concave files but I'm not convinced yet. Neither one gives me the accuracy of the 3 corner file.
Although I must say, the new StewMac Z-files are turning out to be quite handy in some 'over the body' situations.
Anyway, some serious polishing and we're done!
Last 2 shots: look at those shiny things! My camera won't get this, but they are basically mirrors.
<click the pic for more>


The guitar is now setup with a new fully compensated bone saddle and bone nut, and she looks amazing!
Oh, and the shim? That get's thrown into my collection of doodads and thingy's, just in case.
But I'm guessing I'll probably never need it again :-).


Opmerkingen